Changing Your Website Logo or Website Title
Inserting your website title or church logo is an important part of building your website, as it will be seen on all pages and let your viewers know who and what they are viewing. This tutorial shows you how to edit your logo and insert it into your website.
Note: If you don’t have a logo, simply leave the logo link box blank (under SF Theme Options in your Church Website admin). Your domain name will now show up in text at the top instead of your logo. To change this text, simply go to your website control panel and under Settings click on General. Then type in your desired name in the Site Title box.
Important: Your logo size should be 541px wide x 100px high and saved as a transparent PNG. You cannot use just any size image. You must make your image the right specifications in order to fit within the allowed logo size.
You may use any photo editing software to prepare or create your church logo. For this tutorial we will use a free online program called PIXLR.
In this tutorial we will work on a transparent PNG background. That way your logo will overlay perfectly on the website background. If you don’t use a transparent background, you will end up with an ugly-looking block that will ruin the professionalism of your site. If you follow our instructions carefully, you will end up with one amazing looking logo and site!
PREPARING/CREATING YOUR CHURCH LOGO
- Go to: http://pixlr.com/editor/
- In the little pop-up window click on – Create A New Image
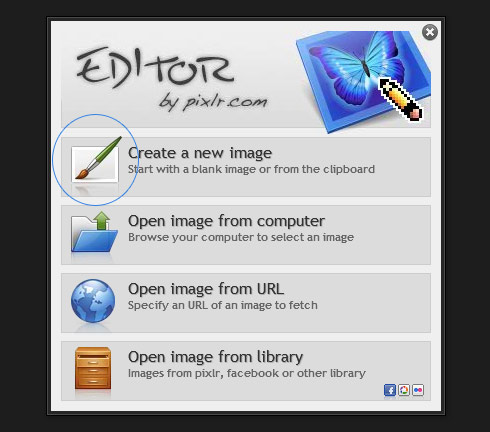
- A new small window will pop-up. You can put a name at the top.
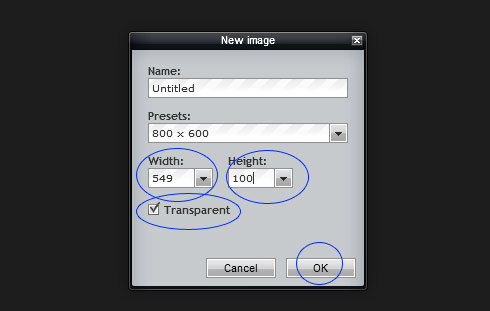
- Leave the Presets line alone
- Click in the width box and type 541
- Click in the height box and type 100
- Click the empty box next to TRANSPARENT (Very important)
- Click OK
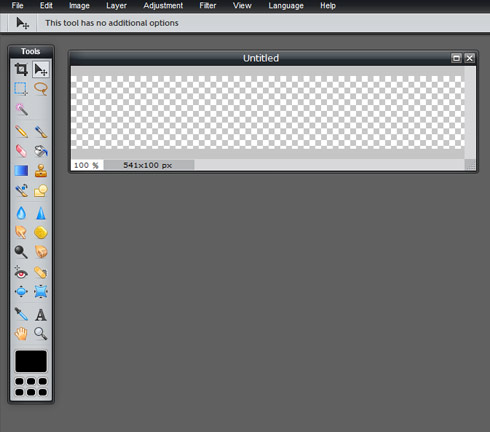
- Your new workspace will open with a box filled with checkered white/gray boxes. This simply means your logo box (541 x 100) has a transparent background.
- Import your current church logo by clicking the FILE from on the black menu (NOT YOUR BROWSER!).
- Then click on OPEN IMAGE from the drop down menu
- Select your image from your computer. (Remember, don’t use a large photo. This should be the icon or logo your church already uses.)
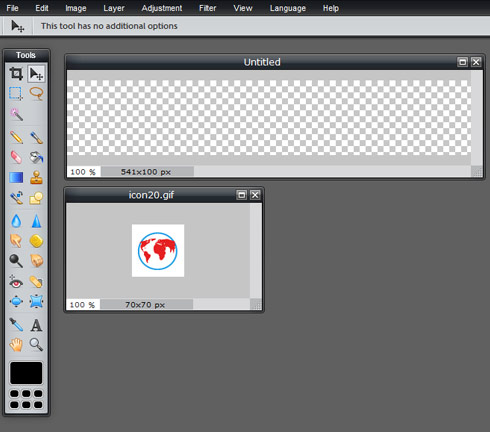
- Once opened inside PIXLR, click on the logo icon. Then click on EDIT from the top black menu and choose SELECT ALL
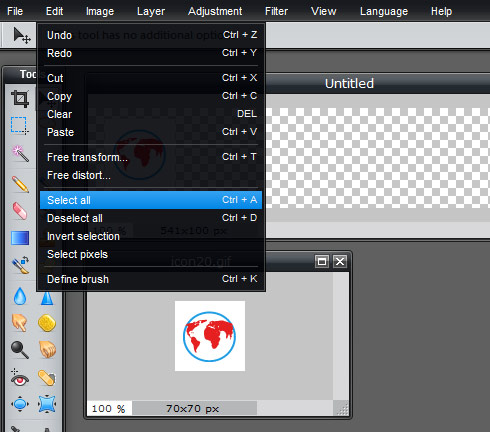
- Again, click on EDIT from the black menu and click on COPY
- Now click on your empty box and click again on EDIT from the black top menu and choose PASTE
- Your logo icon will now have been pasted inside your empty logo box
- Your logo might have a white background space around it. To get rid of it, simply click on the logo icon in your big logo box and then click on the MAGIC WAND.
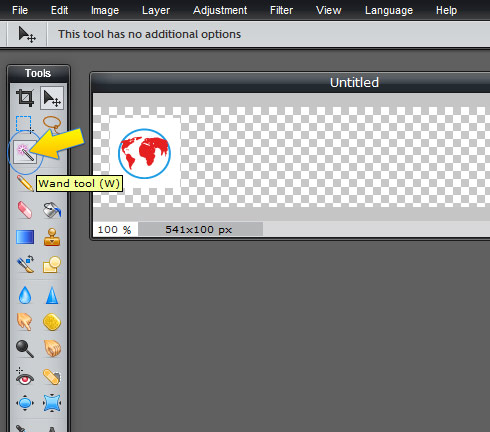
- Now click with the MAGIC WAND tool on the white space around the logo. It will selected it and you will see flashing striped lines. Simply press DELETE on your keyboard. This will now erase the white background and you will end up with just the logo icon.
- Now let’s add some text to the right side of the logo.
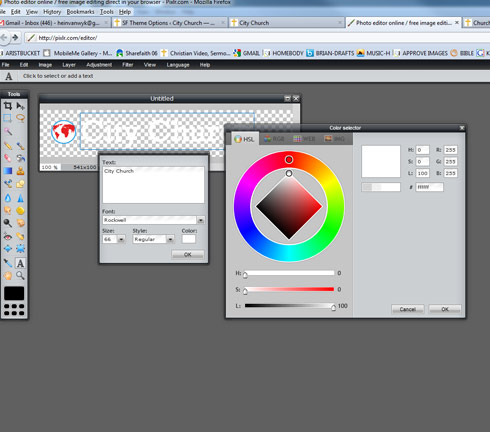
- Click on the letter “A” on the left side toolbar (2nd from the bottom right)
- Position your mouse cursor right next to the logo icon and click. Then start typing
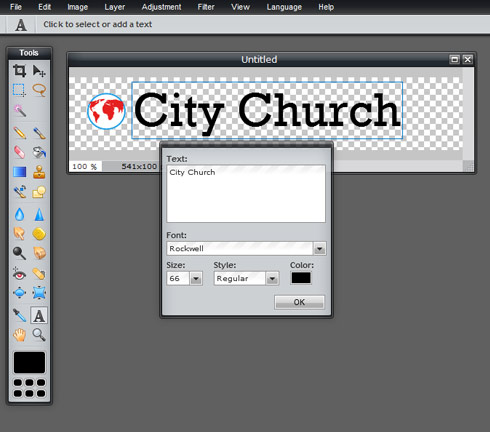
- You can change the Font, Size and color of the text. Once done, move the text where you want it by clicking on the Black ARROW on the left side toolbar and then click again on your text.
- Choose a text color that contrasts the website background design. We highly recommend you use white all the time, unless the background is a very light color.
- When you are done and ready to save, simply change your font color to white (it will be hard to read, on the checkered boxes inside your logo box, but will appear fine on your actual website.
- To change the color, click on the “A” tool in the left toolbar, then click on your text and then click on COLOR. Select your color by dragging the circles to your desired choice. In this example we used the recommended white. When done, click OK.
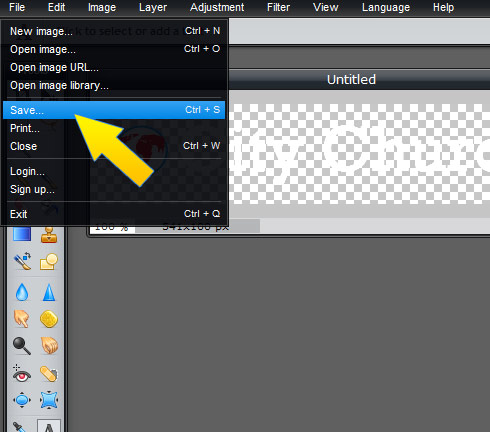
- SAVE your file by clicking on the “FILE” option from the black menu, and then selecting “SAVE…”
- In the window that pops up, type in your logo name at the top
- Under FORMAT, select PNG (Transparent, full quality)
- Then click OK and choose the location where you want to save the file
UPLOADING YOUR CHURCH LOGO TO YOUR WEBSITE
- Log into your church website control panel
- In your left menu bar click on MEDIA
- At the top next to MEDIA LIBRARY, click on ADD NEW

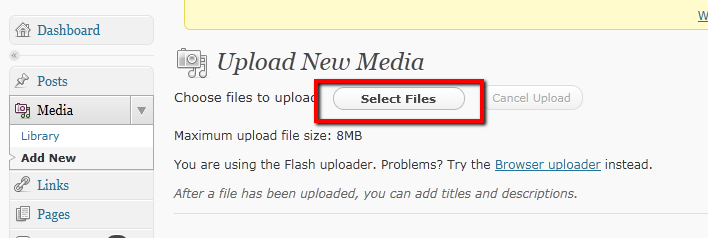
- In the new window, click on SELECT FILES button at the top
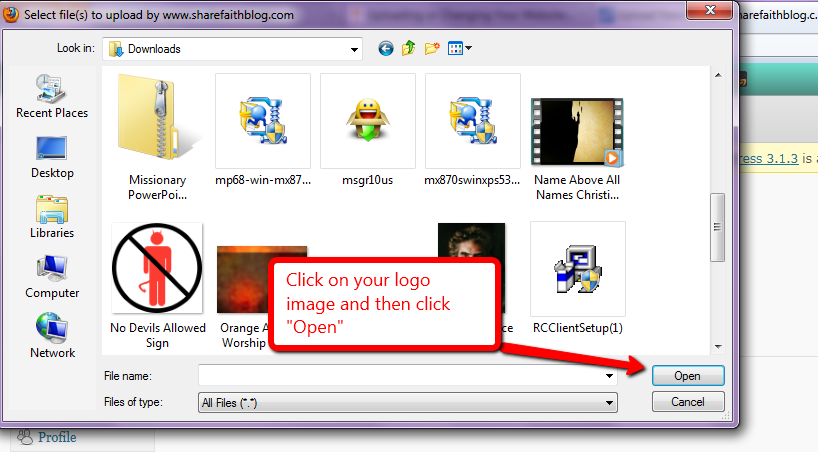
- Find your logo file you just created and click on OPEN
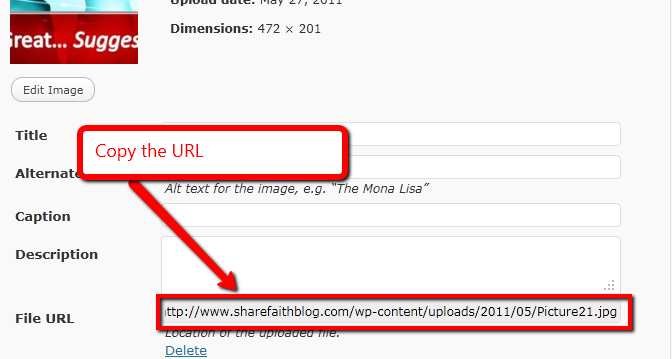
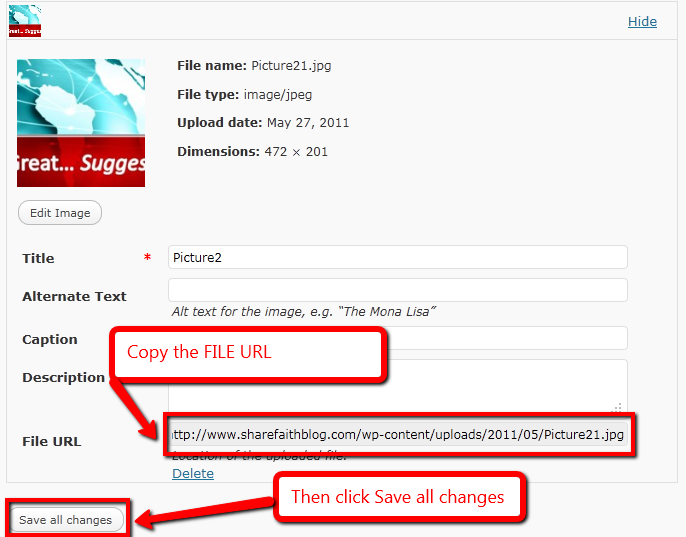
- One uploaded copy the FILE URL
- Click on SAVE ALL CHANGES button
- On the left menu bar, under Appearance, click on SF THEME OPTIONS
- In the 2nd box called “Church Logo Location” paste your URL (link) you just copied.

- Scroll down to the bottom of the page and click on the SAVE CHANGES button.
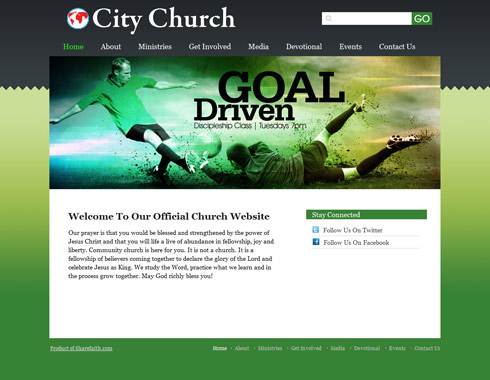
- Preview your website. You should now see your new logo
Note: If you follow these instructions your logo will always display correctly. If, however, you use file formats and sizes not advised in this tutorial, you will end up with a incorrect results.

