Have you made mistakes during a live worship? I’ve certainly had my share and I know there will be more in my future. Pay attention to this short list and I believe the number of mistakes you may make will be reduced.
10 Tips To Avoid Sound Mistakes During Worship
Work towards a better worship service by avoiding these 10 mixing mistakes. Click To Tweet
Prepare
Have a plan and keep it as simple and as consistent as possible. Know the program and what you will need to facilitate. Has the worship leader sent you the list of songs and the arrangements? Who will be playing in the band? Do you have a stage plot? Will there be a guest speaker? The more you know about the service, the more you can prepare. The time you spend in preparation will greatly reduce your frustration and the potential for mishaps. Get to the church early and give yourself time to make sure everything you will need is working. When the service is over make sure everything is taken down and stored correctly. Wrapping the cables the right way will save you an inordinate amount of time in setup the next time.
Have A Back-Up Plan
You’ve prepared for the service, but at the last minute something has changed. Are you ready for this? Be prepared at all times for something to change, fail, break or make an awful noise. Ask yourself: “What would I do if this happened?”
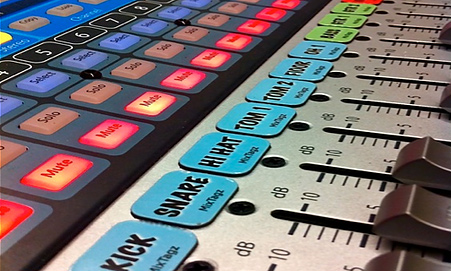
Know Your Mixer (Keep Your Eyes Up)
I get very frustrated when leading worship if I need a monitor adjusted and my tech has his head down looking at the console. I need him to pay attention. The sound operator’s eyes have to be on the platform and on the congregation. You will miss cues, solos, when to mute or un-mute a microphone, observing when levels are not right, etc. Know your console so well that you don’t have to look at it as often. Scan the horizon and be mindful of what the team and the church need you to do. Anticipate what may happen and be ready for it.
Label
You will spend much more time troubleshooting the system than mixing. You are going to be dealing with things that break, buzz, ordon’t work, and you’re going to have to figure out why. There are some things that can help locate the problem faster.
Labeling all of your connections, cables, snakes, inputs and outputs on the console, and processors and amplifiers will enable you to track down the culprit in record time. Clean up the cables behind your console and on the stage.
Garbage In, Garbage Out
I was asked what microphone would be a good choice for a kick drum. I have my favorites, but I asked this person, “How does the kick drum sound by itself without a microphone?” He answered, “Not very good!” Just so you know, there aren’t any microphones, to my knowledge, that make bad sources sound better. Getting the source to sound its best first, is critical. Replacing old guitar strings and worn-out drumheads is something that needs to be done- and done often. Tuning the instruments and having people who know how to play them is fundamental to a good sound. Matching levels on different keyboard patches or different guitar amps/models prevents jarring level differences in your mix. The proper selection and placement of the microphones in relation to: floor monitors, drums /guitar amps, and proximity to the source, will prevent a myriad of mistakes.
Mix at the Right Level
Your eyes and ears will tell you when it’s too loud or not loud enough.
The congregation is a more effective gauge for attaining the right level than your meters are. If it’s too soft, the congregation typically will not engage because they don’t want to be heard singing over the band. If it’s too loud, the people will be sitting, listening as if at a concert. When the levels are just right you’ll see that they are involved in the worship and engaged.
Eliminate the Feedback
The mistake that wakes everybody up is feedback. Microphones that are too close to a loudspeaker or too far away from a source are typically the cause of feedback. Keep the microphones closer to the source to get proper gain. If the singer moves too far away from the microphone, you will try to compensate by raising the level, and feedback happens. Pointing the receiving end of a microphone toward a loudspeaker or a floor monitor will also result in a spine-tingling squeal. Place sound sources and floor monitors in the nulls (see picture below) of the microphone. Ring out your loudspeakers, a process by which equalizers are employed to reduce the levels of certain frequencies that are prone to feedback.

Get the Gain Right
Make sure that every input has the right amount of gain applied. It’s fundamental to a solid mix and will help to mitigate mixing mistakes. You will never achieve the proper mix if you don’t get this right. One thing that will surely mess up your levels is having open microphones on the stage that are not being used at the moment. When you have a doubling of microphones that are on stage not being used, your sound system’s gain will be reduced by -3db for every doubling, and the potential for feedback will be greatly expanded (1-2; 2-4; 4-8, etc). Mute the microphones until they are going to be used. Un-mute them before they start to play or sing. Keeping your eyes up will help you to know when to do this. Missed cues are very noticeable mistakes.
Keep the Vocals on Top
In many churches, sound checks starts with the kick drum and end with the lead vocal. I find this to be less effective because then I rarely have enough headroom left for the vocals to be heard. I do lead vocal first to establish an upper level limit on how loud the vocal needs to be, then I do the kick, drums, and bass. Listen to the lead vocal with drums and bass to see how they mesh. Now fill in with the guitars, keyboards, and background vocals, always keeping the lead vocal on top. We don’t leave church humming the kick drum, so keep the lead singer at the top of the mix.
Tame the Stage
If the stage volume is too loud, your house mix doesn’t stand a chance. In some cases the stage is so loud you can’t even hear the main system. In-ear monitoring will greatly reduce the level on the platform. If you are using wedges (floor monitors) there are many things you can do to help the musicians hear what they need to, and at the same time help the congregation hear what they need to with clarity and at the right level.
Set levels for the house before adjusting monitors. The musicians should have a sense of the room they’re playing in. Place the musicians so that the monitors are aimed at their ears, not at their kneecaps or their backside. Simplify the monitor mixes using STP (self, tempo and pitch) as a guide. That’s really all you need. When the mixes are too complex it is actually more difficult to perform.

